
The Shower Screen Installation Process: A Complete Step-by-Step Guide
A properly installed shower screen can significantly alter the appearance, safety, and functionality of your bathroom. Yet, to get a perfect result, it is necessary to do more than just fit the glass panels. The process of installing a shower screen includes taking accurate measurements, making careful plans, handling the glass safely, fixing it securely and carrying out professional sealing so as to guarantee long-term performance.
Wrong installation can cause various problems, including water leaks, unstable glass panels, poor door alignment, and damage to the bathroom surfaces. That is why it is essential to hire experienced professionals when installing your bathroom shower screen.
At Budget Shower Screens Brisbane, we provide reliable shower screen installation services tailored to your bathroom’s layout, style, and functional requirements. Our experienced installers will take accurate measurements and carry out all necessary quality checks to ensure your shower screen is fitted safely and properly.
This article explains the shower screen installation process step by step, from the initial bathroom assessment and measurements to glass installation, sealing and final quality checks.
Book Your Shower Screen Installation Today
What takes place when a shower screen is installed?
The installation of a shower screen involves a number of important stages, starting with the first enquiry and finishing with a detailed inspection following the work. To ensure the shower screen fits correctly and functions efficiently, a professional installer follows a systematic method.
The complete installation journey typically includes:
- Initial consultation and understanding your requirements
- Bathroom assessment and site inspection
- Accurate measurement of the shower area
- Selecting the right shower screen design
- Custom glass preparation and manufacturing
- Professional installation appointment
- Final alignment and waterproofing checks
Since every bathroom is different, it is important to have a professional assessment to achieve a secure and attractive result.
Step 1: Initial Consultation and Bathroom Assessment
Understanding Your Shower Space and Requirements
The very first thing you should do when following a shower screen installation guide is to get a clear understanding of your bathroom layout and your specific requirements. As part of the initial consultation, the installers review the layout, current conditions, and your preferred design style.
A professional bathroom assessment considers:
- Bathroom size and layout
- Existing shower screen condition
- Available shower space
- Customer design preferences
- Bathroom renovation requirements
At this stage, you can consider options such as semi-frameless and framed shower screens.
Homeowners often opt for custom shower screens because they fit their bathroom dimensions and reflect their design preferences. If you are either replacing an old screen or fitting a new one, choosing the correct style will help to achieve both a pleasing appearance and good practical performance.
Step 2: Accurate Measurement of the Shower Area
Why Professional Measurements Are Important
Measurement accuracy is one of the most important aspects of fitting a shower screen, since glass shower screens are made to exact dimensions, and even small measurement errors can affect the final installation.
Professional installers carefully measure:
- Wall-to-wall dimensions
- Shower opening width
- Glass panel requirements
- Door opening clearance
- Floor levels and wall alignment
They also inspect the installation area to identify possible challenges before manufacturing begins.
Common measurement mistakes include:
- Incorrect glass sizing
- Poor door clearance
- Water leakage problems
- Uneven shower screen installation
Incorrect measurements may cause the glass panels to fit improperly or lead to doors that fail to open and close smoothly. Taking professional measurements guarantees that your shower screen will be made accurately and fitted securely.
Step 3: Choosing the Right Shower Screen Design
The selection of a shower screen design will depend on your bathroom style, the available space, and your personal preferences. Various shower screen options offer different advantages.
Semi-Frameless Shower Screen Installation
Semi-frameless shower screens strike a balance between modern design and practicality, linking glass sections with minimal framing to achieve a stylish look while providing extra support.
They are suitable for homeowners looking for:
- A modern bathroom upgrade
- A cost-effective glass solution
- A combination of durability and style
- Flexible design options
Framed Shower Screen Installation
Framed shower screens are a traditional and practical option for a bathroom, with glass panels surrounded by aluminium framing, which provides extra structure and support.
Advantages include:
- Strong aluminium framing
- Reliable performance
- Practical design
- Suitable for many bathroom layouts
The right choice for you will depend on your bathroom design, budget, and future requirements.
Step 4: Preparing the Bathroom Before Installation
What Needs to Be Ready Before Installing a Shower Screen?
Before starting the installation, the bathroom should be properly prepared, as a suitable installation area will allow the shower screen to be fitted safely and accurately.
Preparation requirements include:
- Completed bathroom tiling
- Waterproofing completed
- Shower base prepared
- Installation area cleaned
- Old shower screen removed if replacing an existing unit.
A preparation checklist includes:
- Tiles fully cured
- Walls ready for drilling
- Shower area accessible
- Plumbing fixtures installed
Careful preparation reduces delays during installation and helps avoid problems after the shower screen has been fitted.
Step 5: Installing Shower Screen Glass Panels and Hardware
Installing Wall Channels, Brackets and Hinges
Once the measurements have been confirmed and the bathroom is ready, the installers start fitting the necessary hardware. Accuracy is essential at this stage, as incorrect positioning may affect both the stability and the appearance of the shower screen.
The process includes:
- Marking fixing points
- Installing wall channels or brackets
- Checking positioning and alignment
- Securing hardware correctly
- Preparing hinges for shower doors
Each fixing point must be carefully positioned to provide proper support for the glass panels.
Installing Glass Panels Safely
Because glass fitting requires specialised knowledge and equipment, shower screens made of toughened safety glass must be handled with care to avoid damage.
During installation, professionals:
- Position fixed glass panels securely
- Install shower doors correctly.
- Adjust hinges for smooth movement.
- Check glass alignment
Safe glass handling is essential because incorrect installation can compromise both safety and performance.
Step 6: Applying Silicone Sealant and Waterproofing
How Shower Screens Are Sealed to Prevent Leaks
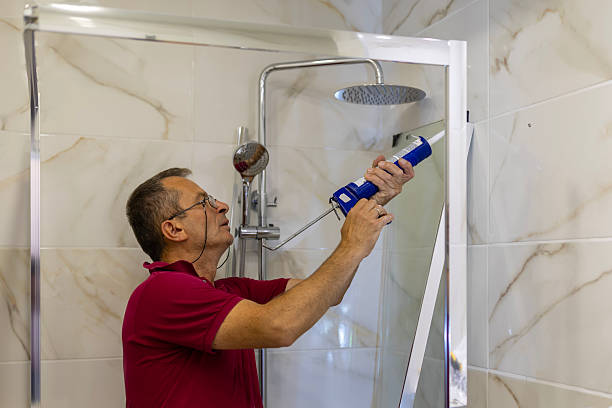
An important aspect of the procedure for fitting a shower screen is the use of the right sealant, with waterproofing being achieved around the shower screen by professional installers using bathroom-grade silicone.
The sealing process involves:
- Applying silicone along glass edges
- Sealing gaps between surfaces
- Checking corners and joints
- Ensuring water remains inside the shower area
Poor silicone application can cause:
- Water leaks
- Damaged tiles
- Mould growth
- Loose fittings
If a shower screen is properly sealed, it will be more durable and also help to protect your bathroom from moisture damage.
Step 7: Final Inspection and Quality Testing
What Happens After Installation?
Once the shower screen has been fitted, a final inspection is carried out to ensure that all requirements meet the quality standards.
Installers check:
- Door movement and operation
- Glass panel alignment
- Silicone seals
- Hardware stability
- Overall finish
The glass surfaces are cleaned, and the customer is guided through the completed installation. This final walkthrough ensures you understand how to maintain your new shower screen.
How Long Does Shower Screen Installation Take?
Generally:
- Standard shower screens may be installed within a few hours.
- Custom installations may require additional preparation and precision.
- Replacement installations may take longer if an old screen needs to be removed.
Factors affecting installation time include:
- Bathroom layout
- Glass size and design
- Custom requirements
- Existing shower screen removal
- Installation complexity
Professional installers make the process easier by having everything they need ready before their installation appointment.
How Much Does Shower Screen Installation Cost?
The cost to install a shower screen depends on several factors, as each bathroom project is different and pricing varies with the specific requirements of your installation.
Factors That Influence Shower Screen Installation Cost
Important factors include:
- Type of shower screen selected
- Glass thickness
- Hardware options
- Bathroom complexity
- Custom measurements
- Replacement requirements
Because of the specialised methods of manufacturing and installation, semi-frameless designs, custom glass sizes, and high-end hardware may involve an extra outlay.
To get a reliable estimate, ask for a professional quote tailored to your bathroom needs.
Common Shower Screen Installation Mistakes to Avoid
Taking steps to avoid installation mistakes will help improve safety, appearance, and durability.
Incorrect Measurements
Incorrect measurements may cause the glass panels to fit poorly, make the door difficult to operate, and delay installation.
Poor Silicone Application
If the silicone seal is inadequate or inconsistent, water may leak out, which can damage the bathroom over time.
Using Incorrect Fixings
The use of inappropriate brackets or fixings will decrease the stability of the shower screen.
Installing Glass Without Proper Support
Glass panels need proper support during installation to keep them from moving or getting damaged.
Skipping Professional Alignment Checks
Doors might not close properly, and the overall finish might appear uneven if alignment is not checked.
DIY Shower Screen Installation vs Professional Installation
| DIY Installation | Professional Installation |
| Requires specialist tools and skills | Installers have correct equipment and experience |
| Higher risk of measurement mistakes | Accurate measurements and fitting |
| Safety concerns when handling glass | Safe handling of toughened safety glass |
| Possible water leakage issues | Professional sealing and waterproofing |
Although it might seem attractive to install them yourself, shower screens require a high degree of precision and specialised knowledge. It is particularly advisable to have them professionally installed because of their size, weight, and the requirements involved in installing custom glass screens.
Why Choose Budget Shower Screens Brisbane for Installation?
Selecting the right installer ensures your shower screen looks excellent and works reliably for many years.
Budget Shower Screens Brisbane provides:
- Custom shower screen solutions
- Experienced installation professionals
- Quality glass products
- Accurate measurements
- Reliable installation services
- Brisbane local expertise
We focus on installing shower screens in residential bathrooms safely, accurately, and in a visually appealing way.
Request Your Free Shower Screen Installation Quote
Conclusion
To install the shower screen, careful planning, accurate measurements, safe handling of the glass, and professional sealing are all necessary; each of these steps is important to produce a secure, durable, and visually attractive bathroom feature.
From choosing the appropriate shower screen design to conducting the final quality inspections, experienced installers ensure your investment delivers long-lasting performance.
We can offer expert advice and carry out professional installations if you are planning to renovate your bathroom or are replacing an existing shower screen.
Upgrade Your Bathroom With Expert Shower Screen Installation
Call us on 1300 727 791 or book a free on-site measure and quote. Our installers work right across Brisbane’s north, including Chermside, Aspley, Nundah, Boondall and Narangba.
Frequently Asked Questions About Shower Screen Installation
How long does it take to install a shower screen?
Most standard shower screen installations can be completed within a few hours. Custom installations may take longer due to additional preparation and precision requirements.
Can a shower screen be installed on existing tiles?
Yes, shower screens can usually be installed on existing tiles if the surface is suitable and properly prepared.
How long after installation can I use my shower?
The waiting time depends on the silicone curing process. Your installer will advise when the shower is ready to use.
Do I need professional shower screen installation?
Professional installation is recommended to ensure accurate fitting, safe glass handling and proper waterproof sealing.
Can you replace and install a new shower screen?
Yes, professional installers can remove old shower screens and install new replacement options.