How to Clean a Sliding Shower Screen

How to Clean a Sliding Shower Screen: A Step-by-Step Guide

A sliding shower screen needs more than a quick wipe of the glass. Soap, shampoo, hair, water deposits and dirt can collect on the glass, tracks, rollers, seals and frame. 

The easiest way to clean a sliding shower screen is to remove loose debris first, clean the glass with a suitable non-abrasive cleaner, then clean the tracks, rollers, and seals, and then rinse and dry everything.

This guide explains how to clean shower glass, remove common stains, and keep a sliding screen cleaner longer.

Why Do Sliding Shower Screens Get Dirty?

Soap and Product Residue

Soap, shampoo, conditioner and body wash can leave a thin film on the glass. Skin oils can add to the buildup, making the screen look dull.

Hard Water and Mineral Deposits

When water dries on glass, it can leave white marks, cloudy patches and limescale. These hard water stains become more difficult to remove when they are allowed to build up.

Dirt and Hair in the Tracks

Sliding tracks collect hair, dust, soap residue and shower screen grime. The bottom track needs the most attention because water and debris tend to settle there.

Moisture and Poor Ventilation

A damp bathroom can encourage mould around seals, corners and tracks. Good ventilation helps surfaces dry faster.

What You Need for Cleaning
What You Need for Cleaning

Cleaning Supplies

Keep the following items nearby:

  • Microfibre cloths
  • Soft sponge
  • Soft toothbrush or detail brush
  • Squeegee
  • Spray bottle
  • Warm water
  • Suitable shower-screen cleaner
  • Mild dishwashing liquid, if appropriate

What to Avoid

Do not use steel wool, abrasive scourers, sharp tools or harsh chemicals. These can scratch glass and damage frames, seals or protective coatings. Strong scrubbing is also unnecessary.

How to Clean a Sliding Shower Screen

Step 1: Remove Hair and Loose Dirt

Start with the screen and tracks dry. Pick up hair and remove dust or loose debris. A vacuum with a narrow attachment can be useful for the track.

Starting dry is worthwhile because loose dirt can turn into a messy paste once water is added.

Step 2: Rinse the Glass

Use warm water to rinse the glass and loosen surface soap and dirt. This reduces the amount of scrubbing needed later.

Step 3: Apply a Suitable Cleaner

Use a cleaner designed for shower glass and compatible with the screen’s frame and protective coating. Apply a small amount rather than soaking the entire screen.

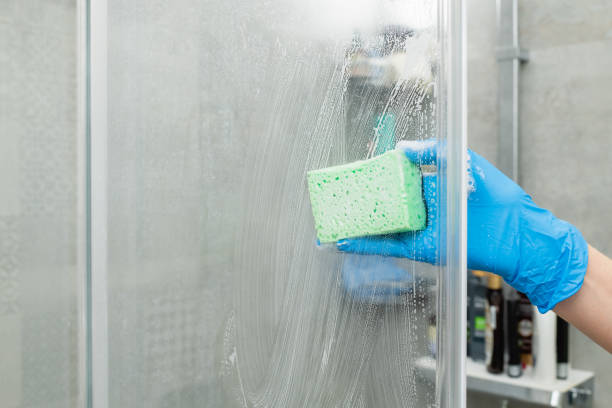
Step 4: Clean the Glass Gently

Use a microfibre cloth or soft sponge and work from top to bottom. Pay attention to cloudy areas and places where soap has dried.

If you are searching for how to clean a glass shower, the same basic method applies: use a suitable cleaner, avoid abrasive materials and rinse the surface properly.

Step 5: Clean the Sliding Tracks

Move the door across to expose the track. Remove any remaining hair and debris, then use a soft toothbrush or detail brush to loosen grime.

Apply cleaner to the cloth or brush instead of flooding the track. Work into the corners and around drainage or weep holes. Wipe away the dirt, rinse carefully and dry the channel.

Step 6: Clean the Rollers

Check the visible rollers for hair, dust and grime. Clean them gently with a soft cloth or brush.

Do not dismantle the rollers unless necessary. After cleaning, slide the door back and forth. It should move smoothly without dragging or sticking.

Step 7: Wipe the Seals and Frame

Clean rubber seals, aluminium frames, door edges, joints and corners with a soft cloth. A small brush can help with narrow areas.

Avoid aggressive scrubbing on coated or finished surfaces.

Step 8: Rinse and Dry

Rinse away all cleaning residue. Then use a squeegee on the glass and a dry microfibre cloth on the glass, frame and tracks.

Drying matters. It removes leftover water that can leave new spots and mineral deposits.

How to Clean Sliding Shower Tracks Without Removing the Door

You do not need to remove the shower door for routine cleaning. First, remove hair and loose dirt. Use a soft brush to reach narrow channels and corners, then clean with a small amount of suitable product.

Do not flood the track with water or cleaner. Check drainage openings for blockages and wipe the track dry when finished.

This method is useful if you’re looking for how to clean shower screen tracks, how to clean shower door tracks, or how to clean shower tracks without removing doors.

How to Remove Common Shower Screen Stains

Soap Scum

Apply a suitable shower-screen cleaner and allow it to loosen the residue. Wipe with a soft sponge or microfibre cloth, and rinse afterwards.

Hard Water Stains

A suitable mineral-deposit cleaner can help with water marks. Always check the product instructions before using it on treated glass or surrounding surfaces.

White Mineral Deposits

Fresh deposits are easier to remove than old buildup. Regular cleaning can prevent them from becoming thick and difficult to remove.

Mould on Seals

Use a suitable mould cleaner and gently clean the affected seal. Dry the area afterwards. If mould keeps returning, damaged seals or poor ventilation may be contributing to the problem.

Grime in Aluminium Tracks

Use a soft brush to loosen dirt without scratching the finish. Wipe the track clean, then dry it.

Can You Use Vinegar on a Shower Screen?

Diluted vinegar can help with some mineral deposits, but it is not suitable for every surface. Check the manufacturer’s instructions before using it, if the glass has a protective coating or the bathroom contains natural stone.

Never mix vinegar with other cleaning chemicals.

What Should You Not Use?

Avoid steel wool, abrasive pads and sharp tools. They can scratch glass or damage finishes.

Harsh chemicals should also be avoided unless the manufacturer specifically recommends them. If your screen has a protective coating, use only products suitable for that treatment.

Most importantly, never mix different cleaning products.

How Often Should You Clean a Sliding Shower Screen? 

Cleaning task  Suggested Frequency
Squeegee glass After every shower
Wipe glass Several times a week
Clean glass Weekly
Clean tracks Weekly or when buildup appears
Clean seals Monthly
Check rollers Periodically
Deep clean Monthly or as needed

The right routine depends on how often the shower is used, water quality and bathroom ventilation.

How to Keep Your Shower Screen Cleaner

A few simple habits can reduce heavy buildup. Use a squeegee after each shower and wipe away soap residue before it dries. Remove hair from the tracks regularly, and keep them as dry as possible.

Good ventilation also helps. It may not seem important, but reducing moisture can make a noticeable difference to mould and grime.

When Does a Shower Screen Need Repair or Replacement?

Cleaning will not fix every problem. Cracked glass, damaged seals, worn rollers, a door that keeps sticking, damaged frames or water escaping from the enclosure may require professional attention.

A screen that stays cloudy or etched after proper cleaning may also need more than a standard clean.

If your sliding screen is damaged or hard to operate, Budget Shower Screens can help with replacement and installation.

Final Thoughts

Knowing how to clean a glass shower screen is mainly about regular care. Clean the glass, remove buildup from the tracks, check the rollers and seals, and dry the screen properly after cleaning. These simple steps can help keep the screen clearer and easier to operate.

If cleaning no longer solves the problem, replacement may be a better option.

If your shower screen is damaged, difficult to operate or beyond cleaning, Budget Shower Screens Brisbane can help. The team provides shower screen replacement and installation options for different bathroom layouts and requirements. For advice about your existing screen or a new installation, call 1300 727 791. 

Frequently Asked Questions

How Do You Clean a Sliding Shower Screen?

Remove loose dirt, rinse the glass, apply a suitable cleaner, wipe gently, then clean the tracks, rollers and seals before rinsing and drying.

How Do You Clean Sliding Shower Door Tracks?

Remove hair and debris first. Use a soft brush and suitable cleaner, clean the corners and drainage openings, then wipe and dry the track.

What Is the Best Cleaner for a Sliding Shower Screen?

A non-abrasive shower-screen cleaner is suitable. Always check that it is safe for the glass, coating, frame and manufacturer’s recommendations.

Can I Use Vinegar on My Shower Screen?

Diluted vinegar may help remove mineral deposits, but check surface compatibility first. Avoid unsuitable coatings and natural stone, and never mix cleaning chemicals.

How Do You Remove Soap Scum From Sliding Shower Doors?

Use a suitable cleaner to loosen the residue, then wipe with a microfibre cloth or soft sponge. Rinse the glass and dry it afterwards.

How Do You Remove Hard Water Stains From Shower Glass?

Use a suitable mineral-deposit cleaner and follow its instructions. Clean gently, rinse thoroughly and dry the glass to reduce further water spotting.

How Often Should I Clean My Shower Screen?

Squeegee after every shower and clean the glass and tracks weekly. Clean seals monthly and deep-clean whenever noticeable buildup develops.

How Do You Clean Shower Screen Rollers?

Remove visible hair and dirt with a soft brush or cloth. Avoid unnecessary dismantling and check that the door slides smoothly after cleaning.

How Do You Clean Mould From Shower Screen Seals?

Use a suitable mould cleaner and gently clean the affected seals. Dry them afterwards and check ventilation if mould continues returning.

Why Is My Sliding Shower Door Difficult to Open?

Hair, grime, mineral deposits or worn rollers can affect movement. Cleaning may help, but damaged or worn rollers may need professional attention.

Can a Cloudy Shower Screen Be Cleaned?

Often, yes. Soap and mineral deposits can usually be removed, but permanently etched or damaged glass may remain cloudy after cleaning.
Clear vs Frosted Shower Glass

Clear vs Frosted Shower Glass: Which Is Better?

Choosing shower glass is one of those small bathroom decisions that can affect the whole look and feel of the room. Clear vs frosted shower glass is mainly a choice between openness and privacy, but other factors matter, too. Bathroom size, natural light, cleaning, design and who uses the space can all make a difference.

Clear glass keeps the room open and lets you see the shower area. Frosted glass gives more privacy and creates a softer appearance. Neither option is better for every bathroom.

This guide compares clear and frosted shower glass to help you choose a finish that suits your bathroom, lifestyle and design.

What Is the Difference Between Clear and Frosted Glass?

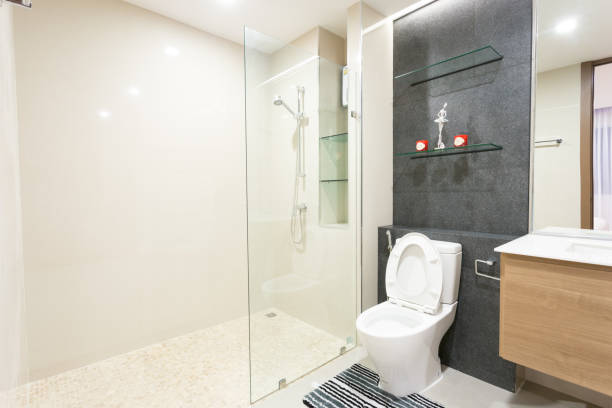
Clear shower glass is transparent. It provides an uninterrupted view of the shower and allows light to pass through freely. This makes it popular in modern bathrooms.

Frosted glass has an opaque or semi-opaque finish that reduces visibility. It still allows light through but gives the shower area more privacy. Frosting can be applied in different ways, including etched, sandblasted, patterned and partial finishes.

Clear and Frosted Glass at a Glance

Feature  Clear Glass  Frosted Glass 
Privacy Low High
Natural light Excellent Good
Sense of space More open More enclosed
Feature tiles Easy to see Partly hidden
Water marks More visible Less noticeable
Shared bathroom Less private More suitable
Small bathroom Helps openness Can feel enclosed

Benefits of Clear Shower Glass

Benefits of Clear Shower Glass

Clear glass can make a bathroom look larger. This is useful in smaller rooms because the glass does not interrupt the view across the space.

It also allows natural light to move through the bathroom. If you have a window near the shower, clear glass can help keep the room feeling bright.

Another benefit is appearance. Feature tiles, wall niches, tapware and other bathroom details remain visible. A clear glass shower screen is a good match for simple, modern and minimalist designs.

There is one obvious downside. Privacy is limited. Water spots, soap marks and fingerprints can also be easier to see. If the shower is used by several people, that may become a concern.

Benefits of Frosted Shower Glass

The main reason people choose frosted glass is privacy. It reduces visibility into the shower, making it useful for shared, family and guest bathrooms.

It can also give the bathroom a softer look. Instead of a completely transparent panel, you get a gentle visual separation between the shower and the rest of the room.

Some marks may be less noticeable on a frosted surface than on clear glass. That does not mean cleaning can be ignored, though. Soap residue, hard-water deposits and grime can still build up.

When comparing frosted vs clear shower glass, privacy is the deciding factor. The amount of privacy will depend on the type and coverage of the frosting.

Which Is Better for Privacy?

Frosted glass is the clear choice when privacy is important. Clear glass offers little visual screening, while frosted finishes can hide most of the shower area.

You do not always need to frost the entire panel, either. A privacy band or partial frosting can provide some screening while keeping part of the glass clear.

The bathroom’s position should also be considered. A private ensuite may not need much privacy, while a bathroom next to a bedroom or living area might benefit from it.

Which Glass Is Easier to Clean?

Both types need regular cleaning. The difference is mainly how visible the marks are.

Clear glass shows water spots, soap residue and fingerprints more easily. This can be annoying, but it also makes it easier to notice when the glass needs attention.

Frosted glass may hide some everyday marks, depending on the finish. Textured or etched surfaces can still collect residue.

A simple routine helps with either option. Use a squeegee after showering, wipe the glass regularly and use a suitable glass cleaner when needed.

Which Is Better for a Small Bathroom?

Clear glass is a good choice for a small bathroom because it maintains open sightlines. The shower does not look like a separate enclosed section, so the room can feel less crowded.

Frosted glass can create more visual separation. In a very small bathroom, this may make the space feel slightly more enclosed.

Privacy can be more important than the sense of space. If that is the case, consider partial frosting rather than choosing completely frosted glass.

What About Natural Light?

Clear glass provides maximum transparency. It allows light to move through the bathroom without a visual barrier.

Frosted glass also allows light through, but it diffuses the view. The exact amount of light depends on the finish.

So, if maximum brightness and openness are priorities, clear glass has an advantage. If softer light and privacy matter more, frosted glass may be worth considering.

Matching Glass to Your Bathroom Style

Clear glass works well with semi-frameless screens, modern fixtures, feature tiles, and minimalist bathrooms. It keeps the design simple and allows other features to stand out.

Frosted glass can suit bathrooms where privacy is part of the design. It works well in family and guest bathrooms and can add a softer visual element.

When choosing a clear or frosted shower screen, also think about the frame. Semi-frameless and framed screens create different looks. Black-framed screens, for example, create stronger contrast, while semi-frameless designs feel lighter.

Different Frosted Glass Options

Frosted glass is available in several finishes. Acid-etched glass has a smooth, consistent appearance. Sandblasted glass has a different matte texture created through abrasive treatment.

Patterned and textured glass, such as reeded or fluted styles, can also provide privacy while adding more character.

Partial frosting is another option. You might choose clear glass with a frosted band, or use frosting on one section of the screen.

Can Clear and Frosted Glass Be Combined?

Yes. You do not necessarily have to choose one finish for the entire shower.

For example, a clear shower door can be paired with a frosted fixed panel. Another option is a privacy band across otherwise clear glass.

This can be useful when you want privacy but still want the bathroom to feel open. It also gives you more freedom when working around feature tiles or a bathroom layout.

Safety and Installation

Shower screens use safety glass, so glass selection is not just about appearance. Correct measurements and professional installation are also important.

For an Australian bathroom, a shower screen should be installed in compliance with industry standards. A professional installer can advise on suitable glass, screen configuration, and installation methods.

How Should You Choose?

Choose clear glass if you want:

  • A more open bathroom
  • Maximum natural light
  • Better visibility of feature tiles
  • A minimalist appearance
  • A good option for a private ensuite

Consider frosted glass if you want:

  • More privacy
  • A softer appearance
  • Less direct visibility into the shower
  • A practical option for shared bathrooms

A combination of the two may work if you want privacy without completely closing off the shower.

Find the Right Shower Screen for Your Brisbane Bathroom

Budget Shower Screens Brisbane can help you find a shower screen that suits your bathroom size, layout and preferred style. Whether you are considering clear, frosted or a combination finish, professional advice can make the choice easier.

The team can discuss available options, measurements and installation for your bathroom. If you are unsure which finish will work best, getting advice before ordering can save time and avoid an unsuitable choice.

Call Budget Shower Screens on 1300 727 791 to discuss your requirements and arrange an on-site measure and quote.

FAQs

Is clear or frosted glass better for a shower screen?

Clear glass suits open modern bathrooms, while frosted glass offers greater privacy. The better option depends on bathroom size, layout, style and personal preference.

Is frosted shower glass more private?

Yes. Frosted glass reduces visibility through the shower panel. The level of privacy depends on the frosting style, coverage and pattern.

Does frosted glass make a bathroom look smaller?

It can make the room feel more enclosed because it interrupts sightlines. Good lighting and careful placement can help balance this effect.

Does clear glass make a small bathroom look bigger?

Clear glass can make a small bathroom feel more open because it maintains uninterrupted sightlines between the shower and the rest of the room.

Which shower glass is easier to clean?

Both require regular cleaning. Clear glass shows marks more easily, while some textured frosted finishes can hold residue and need careful cleaning.

Does frosted glass hide water spots?

Frosted glass can make some water spots less noticeable. Mineral deposits and soap residue can still build up and require regular maintenance.

Can shower screens have both clear and frosted glass?

Yes. A clear door can be combined with a frosted panel, privacy band or partial frosting to provide both openness and additional privacy.

What is the most private type of shower glass?

Fully frosted or heavily obscured glass provides the highest privacy. The actual result depends on the glass finish and how much of the panel is covered.

Is frosted glass more expensive than clear glass?

The cost varies according to glass type, screen size, configuration, and installation. Frosting can affect pricing, but it is only one factor.

Can existing clear shower glass be changed to frosted?

It may be possible to add a suitable privacy film or replace the panel. A professional should inspect the existing screen before recommending an option.

What size shower screen do I need

What Size Shower Screen Do I Need?

Choosing the right shower screen is not only about picking a size from a catalogue. The shower recess, bathroom layout, screen style, door opening and nearby fixtures all affect the final measurement. So, what size shower screen do I need depends on the space available and how the screen will be installed.

Common Australian shower areas include 900 × 900mm, 1000 × 1000mm and 1200 × 900mm. These are common shower layouts, not guaranteed glass dimensions. The finished opening should always be measured before ordering.

This guide covers common sizes, screen heights, measuring tips and when a custom shower screen may be the better option.

What Are Common Shower Screen Sizes?

There is no single size that suits every bathroom. A standard shower screen size can vary by screen style and shower configuration.

Screen type  Common width  Common height 
Corner shower 900–1000mm 1900–2000mm
Fixed/walk-in panel 900–1200mm+ 2000–2100mm
Pivot door 750–1000mm 1900–2000mm
Sliding screen 900–1800mm 1900–2000mm
Semi-frameless 800–1200mm 1900–2100mm
Over-bath screen 750–900mm 1400–1500mm

These figures are general planning ranges. Manufacturers, hardware and installation requirements can change the final dimensions.

Is 900 × 900mm a Standard Shower Size?

A 900 × 900mm shower is common in Australian bathrooms for corner installations. It provides a practical balance between shower space and overall bathroom floor area.

It is important to distinguish the shower recess from the glass enclosure. A 900 × 900mm recess does not necessarily require 900 × 900mm glass because channels, frames, hinges, and returns can affect the final measurements.

Is 1000 × 1000mm Better?

A 1000 × 1000mm shower provides more room to move and can feel more comfortable. It may suit a larger bathroom, although the extra space needs to work with the vanity, toilet and bathroom door.

What About a 1200 × 900mm Shower?

A 1200 × 900mm layout works well for rectangular showers. The extra length can create more usable shower space and may provide greater flexibility when positioning the entry, fixed panel, and showerhead.

How Tall Should a Shower Screen Be?

Many shower screens are approximately 1900–2000mm high. Some walk-in designs extend to 2100mm or higher, depending on the bathroom and screen system.

The ceiling height, showerhead position, bulkheads, and surrounding fixtures should all be considered. 

Is a 2000mm Shower Screen Too High?

A 2000mm screen can suit many bathrooms, as long as the ceiling height allows enough clearance. In smaller rooms, the screen should look proportionate and work around existing fittings.

How High Should a Walk-In Screen Be?

Walk-in screens can vary in height because they use a fixed glass panel rather than a fully enclosed enclosure. The height should provide adequate splash protection while keeping access comfortable.

How Wide Should a Shower Screen Be?

How Wide Should a Shower Screen Be

Screen width should be considered together with the shower entry. A wider panel may improve splash protection, but it can also affect access and surrounding fixtures.

Before choosing the width, check the showerhead direction, door movement, vanity, toilet, towel rails, and return panels.

How Wide Should a Walk-In Screen Be?

The appropriate measurement depends on the showerhead position, entry location and how much water needs to be contained.

A larger fixed panel may provide better splash control, but the bathroom still needs a comfortable open entry.

Shower Screen Sizes by Style

Semi-frameless screens can suit corner installations and smaller bathrooms. Depending on the configuration, widths may range from around 900mm to 1500mm or more.

Fully framed screens are commonly used with sliding or pivot doors and can work well in various bathroom layouts.

Walk-in screens use fixed glass panels and need to be planned around splash direction and entry space.

For corner configurations, common shower screen sizes include 900 × 900mm, 1000 × 1000mm, 900 × 1000mm and 1200 × 900mm.

Over-bath screens are smaller, around 750–900mm wide and 1400–1500mm high. The bath edge and showerhead position can affect the final measurement.

How Do I Measure for a Shower Screen?

Accurate measurements are essential when replacing an existing screen. It is best done by a professional. 

Measure the Width

Measure wall to wall at the bottom, middle and top. Where possible, measure after tiling is complete. Recording measurements in millimetres reduces the chance of ordering the wrong size.

Measure the Height

Measure from the finished floor or shower base to the intended screen height. Check both sides because floors and ceilings may not be perfectly level.

Check the Return

For corner screens, measure the return depth as well as the main opening. This helps determine the appropriate panel configuration.

Check Walls and Door Clearance

Walls can look straight but still be slightly out of plumb. Also check whether a hinged door could hit the vanity, toilet, cabinet, towel rail or bathroom door.

Taking measurements at several points is much safer than relying on one measurement.

What Size Shower Screen Do I Need for a Small Bathroom?

Smaller bathrooms may benefit from 800 × 800mm or 900 × 900mm corner layouts, depending on the available space. Sliding doors can also help because they do not require the same door swing as a hinged screen.

A semi-frameless design can create a more open appearance, but the layout should come first. There is little benefit in choosing a particular style if it compromises access or splash protection.

What Size Shower Screen Do I Need for a Large Bathroom?

Larger bathrooms provide more options. A 1200mm-plus shower, wider fixed panel, return panel or walk-in design may work well.

Where space allows, larger shower areas can also accommodate double showers or more open-plan layouts. The screen still needs careful positioning to control water movement.

When Do I Need a Custom-Made Shower Screen?

Custom sizing can be useful when the bathroom does not match common dimensions. This may include out-of-plumb walls, uneven floors, sloping ceilings, bulkheads or unusual openings.

It can also help where nearby fixtures limit door movement or a walk-in shower needs a particular fixed-panel length. Custom does not mean better; it just allows the screen to be designed around the actual space.

What Else Should I Consider?

Before ordering, check:

  • Showerhead position and direction
  • Bathroom door location
  • Vanity and toilet clearance
  • Floor fall and drain position
  • Glass thickness and panel size
  • Hardware and screen style
  • Privacy requirements
  • Water containment
  • Cleaning access

These details can make a big difference to how practical the finished screen feels.

Quick Shower Screen Size Guide

Requirement  General Guide
Common shower area 900 × 900mm
Larger shower area 1000 × 1000mm
Rectangular shower 1200 × 900mm
Common screen height Around 1900–2000mm
Fixed/walk-in panel Often 900–1200mm+
Over-bath screen Often 750–900mm wide
Custom screen Useful for unusual openings

These are general planning ranges only. An on-site measure is recommended before finalising the screen.

Final Thoughts

When considering what size shower screen do I need, start with the bathroom itself rather than a standard chart. The shower opening, entry, fixtures, and screen style all influence the final choice.

With so many shower screen sizes available, the right option is the one that fits your finished space comfortably and provides suitable access and splash control. This is important when comparing shower sizes in Australia for a repair or replacement.

Budget Shower Screens in Brisbane can help you find a practical screen solution for your bathroom layout. Whether you are replacing an existing screen or planning a new installation, accurate sizing can make the process much easier. Call us on 1300 727 791 to discuss your available space, preferred screen style, and installation requirements.

Frequently Asked Questions 

What is the most common shower screen size in Australia?

900 × 900mm is a common shower layout, although 1000 × 1000mm and 1200 × 900mm options are also widely used.

What size shower screen do I need for a 900 × 900 shower?

A 900 × 900 shower does not necessarily require 900 × 900mm glass. The finished opening and screen configuration should be measured.

Is 900 × 900 a good shower size?

Yes. A 900 × 900mm layout provides practical shower space while fitting comfortably in many smaller and medium-sized bathrooms.

What is the standard shower screen height?

Many shower screens are approximately 1900–2000mm high, but height varies by screen style, ceiling, and installation requirements.

How wide should a shower screen be?

The width depends on the shower layout, entry, showerhead position, nearby fixtures and required splash protection.

What size shower screen do I need for a small bathroom?

An 800 × 800mm or 900 × 900mm corner layout may suit smaller bathrooms, while sliding doors can save useful floor space.

What size shower screen do I need for a walk-in shower?

Walk-in screen dimensions depend on the fixed-panel length, showerhead direction, entry position and required splash protection.

Are shower screens a standard size?

No. Common dimensions are available, but screens come in different widths, heights and configurations to suit individual bathrooms.

Can shower screens be made to a custom size?

Yes. Custom screens can suit unusual openings, uneven walls, sloping ceilings, restricted door clearance and specific walk-in designs.

How do I measure a shower screen for replacement?

Measure the width at the bottom, middle and top, check both sides for height, and record the return depth and door clearance.

What size shower screen do I need for a bath?

Over-bath screens are around 750–900mm wide and 1400–1500mm high, but the bath and shower layout determine the final size.

Why Is My Shower Screen Leaking

Why Is My Shower Screen Leaking? Common Causes and Solutions

A leaking shower screen can leave an otherwise clean bathroom with wet floors, puddles near the door, or water escaping around the frame. Why is my shower screen leaking is not always as straightforward as it seems. The glass itself may be fine. The real issue could be a worn seal, failed silicone, poor alignment, or even how water drains from the shower.

This article highlights common reasons shower screens leak, how to identify the source, what you can check yourself, and when repair or replacement is the better option.

What Could Be Behind a Leaking Shower Screen?

There are several possible reasons. Shower screen seals can wear out, silicone can crack, doors can become misaligned, and small gaps can develop around frames or joins. In some bathrooms, the screen is not the main problem at all.

Poor floor fall or slow drainage can push water towards the shower entrance. Improper installation can also leave gaps that let water through. So, before reaching for a tube of silicone, it helps to work out where the water is coming from.

Common Reasons Water Escapes the Shower

Common Reasons Water Escapes the Shower

Worn Seals and Door Sweeps

Rubber seals sit along shower doors and edges to help keep water inside the enclosure. They do not last forever. Constant exposure to water, cleaning products and movement can make them hard, brittle or cracked.

If water is mainly appearing at the bottom of the door, the shower screen rubber seal may be worn or no longer making proper contact with the shower base. In a simple case, replacing the seal may be enough.

Silicone That Has Deteriorated

Silicone is commonly used around shower screen frames, walls and bases. Over time, it can shrink, crack, peel away or develop mould.

Once a gap appears, water can work its way behind the screen. Adding fresh silicone over old, damaged silicone is not always a lasting fix. The existing material needs to be removed, the area cleaned and dried, and the surface properly prepared before resealing.

Gaps Around the Frame

Small gaps between a frame and wall or between the frame and floor can be surprisingly effective at letting water through. You may not notice them during a quick inspection.

If water keeps appearing in the same place despite cleaning and resealing, the gap may point to a fitting or installation problem rather than normal wear.

Doors That Have Shifted Out of Alignment

A shower door needs to close correctly to contain water. Hinges can loosen, sliding doors can move out of position, and seals can stop sitting where they should.

Even a small misalignment may leave an opening along one side or underneath the door. This is noticeable when the shower head points towards the door.

Installation or Positioning Problems

Sometimes the problem goes back to how the screen was installed. If the screen is poorly positioned, misaligned, or inadequately sealed, water may find a path out of the enclosure.

The position of the screen also matters in relation to the shower head and the direction of water flow. A screen can look perfectly normal and still allow water to escape because of its placement.

Poor Floor Fall or Drainage

This is easy to overlook. Water should flow toward the shower waste, not toward the bathroom entrance.

If the floor fall is incorrect, water may naturally move towards the screen and eventually escape. A blocked or slow shower waste can make matters worse. In that situation, replacing the screen seal alone will not solve the underlying problem.

Hinges, Corners and Glass Joins

Semi-frameless and framed screens all have different areas where water can escape. Hinges, corner joins, channels and points where seals meet hardware can create small openings.

A leak around a hinge, for example, may require adjustment or replacement of a component rather than new silicone.

Find the Leak Before Fixing It

Knowing where the water appears can narrow down the likely cause.

Where Water Appears Likely Cause Possible Solution
Bottom of door Worn seal Replace seal
Wall edge Silicone or gap Inspect and reseal
Under screen Seal, frame or drainage Check base and floor fall
Around hinges Alignment or seal Adjust or repair
Glass and frame Seal or installation Inspect components
Across bathroom floor Drainage or screen issue Check water flow

Practical Ways to Prevent Shower Screen Leaks

Start With the Seals

Look for cracked, loose, flattened or discoloured rubber. If a seal has clearly deteriorated, replacement may be a relatively straightforward repair.

Examine the Silicone

Check for peeling, gaps, cracking, shrinkage or visible mould. Do not assume more silicone will automatically fix the issue.

Test the Door

Open and close the shower door slowly. Does it sit evenly? Does it close completely? Is there an obvious gap at the bottom or side?

These simple checks can reveal a problem before you start removing anything.

Watch Where the Water Goes

During a shower, pay attention to the floor. If water naturally moves away from the waste and towards the screen, drainage or floor fall could be contributing to the problem.

Know When to Bring in a Professional

If you’re wondering how to stop shower screen leaking, the right answer depends on the cause. A simple seal replacement may be manageable, but persistent leaks, loose screens, damaged glass or drainage problems need closer inspection.

Can You Handle a Leaking Screen Yourself?

Some minor jobs are suitable for homeowners. Cleaning the screen, clearing a shower track, replacing an accessible seal and identifying visible gaps are reasonable starting points.

But DIY work has limits. A loose screen, badly aligned door, damaged glass, corroded frame, or suspected waterproofing problem should be assessed professionally. Resealing the same area without finding the cause can only postpone the problem.

Repair or Replace: Which Makes More Sense?

When Repair Is Usually Enough

Repair may be suitable when the glass remains sound, and the issue involves worn seals, loose fittings, silicone failure, or door alignment.

When Replacement May Be the Better Choice

Replacement may make more sense when the glass is damaged, frames are heavily corroded, leaks keep returning, or the screen has major installation problems.

The goal is not necessarily to replace a screen whenever it leaks. If the main components are still in good condition, a targeted repair can be enough.

Could a Small Leak Lead to Water Damage?

A small leak does not automatically mean serious damage. Still, leaving water to escape repeatedly is not ideal.

Persistent moisture can contribute to mould and may affect nearby skirting, cabinetry, or other bathroom surfaces. If water is getting behind the shower area, the consequences can be significant over time. The location and duration of the leak matter.

Simple Habits That Help Prevent Leaks

Keep Seals Clean

Remove soap residue and buildup so seals can continue making proper contact.

Check Silicone Occasionally

Look for early signs of cracking, peeling or separation.

Keep the Waste Clear

A slow drain can allow water to build up and move toward the screen.

Ensure Doors Close Properly

Do not ignore a door that suddenly feels loose, catches or leaves a visible gap.

Deal With Small Leaks Early

A minor leak is easier to investigate before it becomes a recurring bathroom problem.

Get Recurring Problems Checked

If the same leak keeps returning, an underlying installation, drainage, or waterproofing issue may be the cause.

Conclusion

If you are looking at how to fix a leaking shower screen, begin by locating the exact point where water escapes. Check the seals, silicone, door alignment, frame, and drainage rather than assuming the glass is faulty.

A suitable repair might be simple, but repeated leaks deserve more attention. Getting the cause right the first time can save unnecessary resealing, replacement parts and frustration.

Budget Shower Screens in Brisbane can help if your shower screen needs attention, repair, or replacement. If you are unsure what is causing the leak, professional advice can help identify the problem before you spend money on the wrong fix. Call us on 1300 727 791 to discuss your shower screen needs and available solutions.

Frequently Asked Questions 

Why is my shower screen leaking at the bottom?

A worn door seal, incorrect door alignment, a damaged sweep, or poor floor drainage can let water escape under the shower screen.

How do I stop my shower screen from leaking?

Check the seals, silicone, door alignment and drainage first. Replace damaged components and address gaps instead of repeatedly adding silicone.

Why is water coming out from under my shower screen?

Water may escape underneath because of a worn seal, incorrect floor fall, poor drainage, a gap around the frame or incorrect screen positioning.

Why is my shower screen leaking from the door?

The door may be misaligned, the hinges may have shifted, or the rubber seal may no longer contact the shower base correctly.

Can I reseal a leaking shower screen?

Yes, minor silicone failure can sometimes be resealed. Old silicone should be removed and surfaces cleaned and prepared before applying new sealant.

How often should shower screen seals be replaced?

There is no fixed replacement period. Inspect seals regularly and replace them when they become cracked, brittle, loose, flattened, or can no longer contain water.

Should I repair or replace a leaking shower screen?

Repair may suit worn seals, silicone or minor hardware issues. Replacement may be better when the glass, frames, or overall screen is significantly damaged.

Can poor drainage cause a shower screen to leak?

Yes. Poor floor fall or a slow shower waste can push water toward the screen, making it seem like the screen itself is responsible.

Why is my shower screen still leaking after resealing?

The leak may come from a worn seal, door alignment, drainage, frame gap or installation issue. Resealing won’t fix every underlying cause.

Shower Screen Installation Process

The Shower Screen Installation Process: A Complete Step-by-Step Guide

A properly installed shower screen can significantly alter the appearance, safety, and functionality of your bathroom. Yet, to get a perfect result, it is necessary to do more than just fit the glass panels. The process of installing a shower screen includes taking accurate measurements, making careful plans, handling the glass safely, fixing it securely and carrying out professional sealing so as to guarantee long-term performance.

Wrong installation can cause various problems, including water leaks, unstable glass panels, poor door alignment, and damage to the bathroom surfaces. That is why it is essential to hire experienced professionals when installing your bathroom shower screen.

At Budget Shower Screens Brisbane, we provide reliable shower screen installation services tailored to your bathroom’s layout, style, and functional requirements. Our experienced installers will take accurate measurements and carry out all necessary quality checks to ensure your shower screen is fitted safely and properly.

This article explains the shower screen installation process step by step, from the initial bathroom assessment and measurements to glass installation, sealing and final quality checks.

Book Your Shower Screen Installation Today

What takes place when a shower screen is installed?

The installation of a shower screen involves a number of important stages, starting with the first enquiry and finishing with a detailed inspection following the work. To ensure the shower screen fits correctly and functions efficiently, a professional installer follows a systematic method.

The complete installation journey typically includes:

  • Initial consultation and understanding your requirements
  • Bathroom assessment and site inspection
  • Accurate measurement of the shower area
  • Selecting the right shower screen design
  • Custom glass preparation and manufacturing
  • Professional installation appointment
  • Final alignment and waterproofing checks

Since every bathroom is different, it is important to have a professional assessment to achieve a secure and attractive result.

Step 1: Initial Consultation and Bathroom Assessment

Understanding Your Shower Space and Requirements

The very first thing you should do when following a shower screen installation guide is to get a clear understanding of your bathroom layout and your specific requirements. As part of the initial consultation, the installers review the layout, current conditions, and your preferred design style.

A professional bathroom assessment considers:

  • Bathroom size and layout
  • Existing shower screen condition
  • Available shower space
  • Customer design preferences
  • Bathroom renovation requirements

At this stage, you can consider options such as semi-frameless and framed shower screens.

Homeowners often opt for custom shower screens because they fit their bathroom dimensions and reflect their design preferences. If you are either replacing an old screen or fitting a new one, choosing the correct style will help to achieve both a pleasing appearance and good practical performance.

Step 2: Accurate Measurement of the Shower Area

Why Professional Measurements Are Important

Measurement accuracy is one of the most important aspects of fitting a shower screen, since glass shower screens are made to exact dimensions, and even small measurement errors can affect the final installation.

Professional installers carefully measure:

  • Wall-to-wall dimensions
  • Shower opening width
  • Glass panel requirements
  • Door opening clearance
  • Floor levels and wall alignment

They also inspect the installation area to identify possible challenges before manufacturing begins.

Common measurement mistakes include:

  • Incorrect glass sizing
  • Poor door clearance
  • Water leakage problems
  • Uneven shower screen installation

Incorrect measurements may cause the glass panels to fit improperly or lead to doors that fail to open and close smoothly. Taking professional measurements guarantees that your shower screen will be made accurately and fitted securely.

Step 3: Choosing the Right Shower Screen Design

The selection of a shower screen design will depend on your bathroom style, the available space, and your personal preferences. Various shower screen options offer different advantages.

Semi-Frameless Shower Screen Installation

Semi-frameless shower screens strike a balance between modern design and practicality, linking glass sections with minimal framing to achieve a stylish look while providing extra support.

They are suitable for homeowners looking for:

  • A modern bathroom upgrade
  • A cost-effective glass solution
  • A combination of durability and style
  • Flexible design options

Framed Shower Screen Installation

Framed shower screens are a traditional and practical option for a bathroom, with glass panels surrounded by aluminium framing, which provides extra structure and support.

Advantages include:

  • Strong aluminium framing
  • Reliable performance
  • Practical design
  • Suitable for many bathroom layouts

The right choice for you will depend on your bathroom design, budget, and future requirements.

Step 4: Preparing the Bathroom Before Installation

What Needs to Be Ready Before Installing a Shower Screen?

Before starting the installation, the bathroom should be properly prepared, as a suitable installation area will allow the shower screen to be fitted safely and accurately.

Preparation requirements include:

  • Completed bathroom tiling
  • Waterproofing completed
  • Shower base prepared
  • Installation area cleaned
  • Old shower screen removed if replacing an existing unit.

A preparation checklist includes:

  • Tiles fully cured
  • Walls ready for drilling
  • Shower area accessible
  • Plumbing fixtures installed

Careful preparation reduces delays during installation and helps avoid problems after the shower screen has been fitted.

Step 5: Installing Shower Screen Glass Panels and Hardware

Installing Wall Channels, Brackets and Hinges

Once the measurements have been confirmed and the bathroom is ready, the installers start fitting the necessary hardware. Accuracy is essential at this stage, as incorrect positioning may affect both the stability and the appearance of the shower screen.

The process includes:

  • Marking fixing points
  • Installing wall channels or brackets
  • Checking positioning and alignment
  • Securing hardware correctly
  • Preparing hinges for shower doors

Each fixing point must be carefully positioned to provide proper support for the glass panels.

Installing Glass Panels Safely

Because glass fitting requires specialised knowledge and equipment, shower screens made of toughened safety glass must be handled with care to avoid damage.

During installation, professionals:

  • Position fixed glass panels securely
  • Install shower doors correctly.
  • Adjust hinges for smooth movement.
  • Check glass alignment

Safe glass handling is essential because incorrect installation can compromise both safety and performance.

Step 6: Applying Silicone Sealant and Waterproofing

How Shower Screens Are Sealed to Prevent Leaks

An important aspect of the procedure for fitting a shower screen is the use of the right sealant, with waterproofing being achieved around the shower screen by professional installers using bathroom-grade silicone.

The sealing process involves:

  • Applying silicone along glass edges
  • Sealing gaps between surfaces
  • Checking corners and joints
  • Ensuring water remains inside the shower area

Poor silicone application can cause:

  • Water leaks
  • Damaged tiles
  • Mould growth
  • Loose fittings

If a shower screen is properly sealed, it will be more durable and also help to protect your bathroom from moisture damage.

Step 7: Final Inspection and Quality Testing

What Happens After Installation?

Once the shower screen has been fitted, a final inspection is carried out to ensure that all requirements meet the quality standards.

Installers check:

  • Door movement and operation
  • Glass panel alignment
  • Silicone seals
  • Hardware stability
  • Overall finish

The glass surfaces are cleaned, and the customer is guided through the completed installation. This final walkthrough ensures you understand how to maintain your new shower screen.

How Long Does Shower Screen Installation Take?

How Long Does Shower Screen Installation Take

Generally:

  • Standard shower screens may be installed within a few hours.
  • Custom installations may require additional preparation and precision.
  • Replacement installations may take longer if an old screen needs to be removed.

Factors affecting installation time include:

  • Bathroom layout
  • Glass size and design
  • Custom requirements
  • Existing shower screen removal
  • Installation complexity

Professional installers make the process easier by having everything they need ready before their installation appointment.

How Much Does Shower Screen Installation Cost?

The cost to install a shower screen depends on several factors, as each bathroom project is different and pricing varies with the specific requirements of your installation.

Factors That Influence Shower Screen Installation Cost

Important factors include:

  • Type of shower screen selected
  • Glass thickness
  • Hardware options
  • Bathroom complexity
  • Custom measurements
  • Replacement requirements

Because of the specialised methods of manufacturing and installation, semi-frameless designs, custom glass sizes, and high-end hardware may involve an extra outlay.

To get a reliable estimate, ask for a professional quote tailored to your bathroom needs.

Common Shower Screen Installation Mistakes to Avoid

Taking steps to avoid installation mistakes will help improve safety, appearance, and durability.

Incorrect Measurements

Incorrect measurements may cause the glass panels to fit poorly, make the door difficult to operate, and delay installation.

Poor Silicone Application

If the silicone seal is inadequate or inconsistent, water may leak out, which can damage the bathroom over time.

Using Incorrect Fixings

The use of inappropriate brackets or fixings will decrease the stability of the shower screen.

Installing Glass Without Proper Support

Glass panels need proper support during installation to keep them from moving or getting damaged.

Skipping Professional Alignment Checks

Doors might not close properly, and the overall finish might appear uneven if alignment is not checked.

DIY Shower Screen Installation vs Professional Installation

DIY InstallationProfessional Installation
Requires specialist tools and skillsInstallers have correct equipment and experience
Higher risk of measurement mistakesAccurate measurements and fitting
Safety concerns when handling glassSafe handling of toughened safety glass
Possible water leakage issuesProfessional sealing and waterproofing

Although it might seem attractive to install them yourself, shower screens require a high degree of precision and specialised knowledge. It is particularly advisable to have them professionally installed because of their size, weight, and the requirements involved in installing custom glass screens.

Why Choose Budget Shower Screens Brisbane for Installation?

Selecting the right installer ensures your shower screen looks excellent and works reliably for many years.

Budget Shower Screens Brisbane provides:

  • Custom shower screen solutions
  • Experienced installation professionals
  • Quality glass products
  • Accurate measurements
  • Reliable installation services
  • Brisbane local expertise

We focus on installing shower screens in residential bathrooms safely, accurately, and in a visually appealing way.

Request Your Free Shower Screen Installation Quote

Conclusion

To install the shower screen, careful planning, accurate measurements, safe handling of the glass, and professional sealing are all necessary; each of these steps is important to produce a secure, durable, and visually attractive bathroom feature.

From choosing the appropriate shower screen design to conducting the final quality inspections, experienced installers ensure your investment delivers long-lasting performance.

We can offer expert advice and carry out professional installations if you are planning to renovate your bathroom or are replacing an existing shower screen.

Upgrade Your Bathroom With Expert Shower Screen Installation

Call us on 1300 727 791 or book a free on-site measure and quote. Our installers work right across Brisbane’s north, including Chermside, Aspley, Nundah, Boondall and Narangba.

Frequently Asked Questions About Shower Screen Installation

How long does it take to install a shower screen?

Most standard shower screen installations can be completed within a few hours. Custom installations may take longer due to additional preparation and precision requirements.

Can a shower screen be installed on existing tiles?

Yes, shower screens can usually be installed on existing tiles if the surface is suitable and properly prepared.

How long after installation can I use my shower?

The waiting time depends on the silicone curing process. Your installer will advise when the shower is ready to use.

Do I need professional shower screen installation?

Professional installation is recommended to ensure accurate fitting, safe glass handling and proper waterproof sealing.

Can you replace and install a new shower screen?

Yes, professional installers can remove old shower screens and install new replacement options.

Signs for Shower Screen Replacement

5 Signs It’s Time for Shower Screen Replacement

Your shower screen is one of the most important features in your bathroom. It helps prevent water from spreading across your bathroom floor, improves safety and contributes to the overall style of your space. However, like any bathroom fixture, shower screens can experience wear and tear over time due to daily use, moisture exposure and ageing components.

At first, it’s easy to ignore small problems with the shower screen. Whether it’s a slight leak, a loose fit, or cloudy glass, the situation may not appear urgent, but such problems can gradually lead to water damage, mould, and costly repairs.

Choosing a shower screen replacement at the right time can help prevent ongoing issues while giving your bathroom a fresh, modern appearance. Instead of repeatedly repairing an old or damaged shower screen, installing a new one can provide better safety, improved functionality and long-term value.

At Budget Shower Screens Brisbane, we provide professional shower screen replacements tailored to your bathroom’s layout, style, and safety requirements. Our team will help you to replace any old, damaged or unsafe screens with high-quality alternatives that not only look good but also work well.

This article explores five key signs that it may be time to replace your shower screen, along with guidance on repair versus replacement and the benefits of installing a new screen.

Get Your Shower Screen Replacement Quote Today

How Long Does a Shower Screen Usually Last?

A good shower screen usually lasts 10 to 20 years, depending on its materials, installation, and care. While toughened safety glass is strong, parts such as seals, hinges, rollers, and frames can wear out over time.

Several factors can affect how long your shower screen lasts, including:

Water Quality

Hard water contains minerals that can build up on glass surfaces and hardware. Over time, mineral deposits can cause permanent staining and affect the appearance of your shower screen.

Cleaning Habits

Regular cleaning helps prevent soap scum, mould and mineral buildup. Using harsh chemicals or abrasive cleaning methods may damage seals and glass finishes.

Bathroom Ventilation

Poor ventilation creates excess moisture, which can contribute to mould growth, the deterioration of silicone seals, and damaged hardware.

Installation Quality

A poorly installed shower screen may experience alignment problems, leaks and loose fittings much earlier than a professionally installed system.

Hardware Quality

The quality of hinges, brackets, handles and frames can significantly impact the overall lifespan of your shower screen.

How do I know my shower screen is reaching the end of its lifespan?

Signs that your shower screen may need replacing include visible glass damage, frequent leaks, difficulty moving the door, damaged seals, or an outdated appearance. If repairs become more frequent, replacement is often the more practical solution.

5 Signs You Need Shower Screen Replacement

1. Your Shower Screen Has Cracks, Chips or Glass Damage

Visible damage to the glass is a strong indication that it’s time to replace your shower screen; even small cracks, chips, or rough edges can become safety hazards and must not be ignored.

Shower screens are composed of toughened safety glass, which is designed to minimise the risk of injury should the glass be damaged. But if the glass has cracks or is otherwise severely damaged, it generally cannot be repaired effectively.

Professional broken shower glass replacement is recommended when you notice:

  • Visible cracks across the glass
  • Chips around glass edges
  • Deep scratches
  • Loose glass panels
  • Unstable brackets or fittings

A damaged shower screen can prove unsafe, particularly when it is subjected to frequent movement, temperature changes, and moisture. Installing a new shower screen will help ensure your bathroom stays safe and functions properly.

If you notice a damaged shower screen, it is best to arrange a professional inspection rather than waiting for the problem to worsen.

2. Water Is Leaking Outside the Shower Area

A leaking shower screen is another sign you might need a replacement. Small leaks can be from worn seals or silicone, but if water keeps leaking, there may be a bigger issue.

Common causes of shower screen leaks include:

  • Failed silicone seals
  • Damaged waterproofing joints
  • Poor glass alignment
  • Worn shower frame components
  • Deteriorated rubber seals

A leaking shower screen can cause several problems, including:

  • Bathroom water damage
  • Mould growth
  • Slippery floors
  • Damaged tiles and walls
  • Increased maintenance requirements

In some cases, resealing may temporarily solve minor issues. However, if your shower screen is old, damaged, or repeatedly leaking, a complete shower screen replacement may provide a more reliable long-term solution.

Replacing an ageing shower screen improves waterproofing performance and helps protect your bathroom from moisture-related damage.

3. The Glass Looks Cloudy, Stained or Permanently Damaged

Over time, shower glass can lose its original clarity due to constant exposure to water, soap products and cleaning chemicals. Cloudy or stained glass can make your bathroom look outdated, even if the rest of the space is well maintained.

Common causes of damaged shower glass include:

  • Hard water mineral buildup
  • Soap scum accumulation
  • Glass etching
  • Permanent staining
  • “Glass cancer” damage

Cleaning vs Replacement

Shower Screen Cleaning Tips

Cleaning may help remove:

  • Surface dirt
  • Soap residue
  • Light water marks

However, replacement may be required for:

  • Permanent glass etching
  • Internal glass damage
  • Heavy discolouration
  • Long-term mineral damage

If your shower glass remains cloudy despite regular cleaning, replacing the screen can instantly improve your bathroom’s appearance and create a cleaner, more modern finish.

4. The Shower Door Is Difficult to Open, Close or Align

A shower door that no longer operates smoothly is another warning sign that your shower screen may need attention. Problems with movement often indicate worn hardware or structural issues.

Common signs include:

  • Door scraping against the floor
  • Loose hinges
  • Broken rollers
  • Door not closing correctly
  • Gaps allowing water leakage

A difficult-to-use shower door may be caused by:

  • Ageing hinges
  • Frame movement
  • Damaged rollers
  • Poor alignment
  • Worn components

While some hardware issues can be repaired, repeated problems may indicate that the entire shower screen system has reached the end of its useful life.

A professional shower door replacement can improve daily convenience while ensuring better safety and performance.

5. Your Shower Screen Looks Old or No Longer Matches Your Bathroom

Bathroom designs change over time, and an outdated shower screen can make your entire bathroom appear older. Replacing your shower screen is an effective way to modernise your space without completing a full renovation.

A new shower screen can improve:

  • Bathroom appearance
  • Property value
  • Modern design appeal
  • Overall functionality

Popular replacement styles include:

Semi-Frameless Shower Screens

Semi-frameless shower screens strike a balance between style and practicality, as they have a modern appearance while still providing extra support through framing.

Benefits include:

  • Flexible design options
  • Stylish appearance
  • Durable construction

Framed Shower Screens

For homeowners who want reliability and functionality, framed shower screens are a practical choice.

Benefits include:

  • Strong aluminium framing
  • Traditional design
  • Cost-effective solution

Shower Screen Repair vs Replacement: Which Option Is Better?

A great many homeowners ask themselves if it is better to repair an existing shower screen or to replace it, the correct decision varying according to the condition, the age and the seriousness of the problem.

ProblemRepairReplacement
Loose handle✓
Minor seal issue✓
Cracked glass✓
Rusted frame✓
Permanent glass stains✓
Repeated leaks✓

Repair may be suitable for minor issues such as replacing a handle or resealing a small area. However, replacement is usually the better option when:

  • Repairs are becoming frequent
  • Safety is compromised
  • Glass is damaged
  • The shower screen is outdated
  • Water leaks continue

Rather than constantly spending money on temporary fixes, fitting a new shower screen is a good long-term solution.

Benefits of Installing a New Shower Screen

Improved Bathroom Safety

Modern shower screens use high-quality toughened safety glass and secure installation methods. A new installation reduces risks associated with damaged glass, unstable fittings, and ageing components.

Better Bathroom Appearance

A modern shower screen can completely transform your bathroom by creating a cleaner and more stylish appearance.

Easier Maintenance

New shower screens often include improved designs and glass treatments that make cleaning easier and reduce buildup.

Increased Property Appeal

A well-designed bathroom is an attractive feature for potential buyers. Replacing an outdated shower screen can improve the overall appeal of your property.

Popular Shower Screen Replacement Options

Semi-Frameless Shower Screens

Semi-frameless options provide a stylish upgrade while offering excellent durability and flexibility for different bathroom designs.

Custom Shower Screens

Custom shower screens are designed according to your bathroom measurements. They are suitable for unique layouts where standard options may not provide the perfect fit.

Why Choose Professional Shower Screen Replacement?

Professional installation ensures your new shower screen is fitted correctly, safely and securely.

Experienced installers provide:

  • Accurate measurements
  • Safe glass handling
  • Compliance with Australian safety standards
  • Quality installation
  • Long-lasting results

Incorrect installation can lead to leaks, poor alignment and safety issues. Choosing a professional shower screen replacement service ensures your investment performs properly for years.

Book your shower screen replacement service today and upgrade your bathroom with a professionally installed solution.

Upgrade Your Bathroom With Professional Shower Screen Replacement

If your shower screen is damaged, outdated, or no longer working properly, a professional replacement can improve your bathroom’s safety, appearance, and functionality.

Budget Shower Screens Brisbane provides expert advice, quality products and professional installation services to help you choose the right shower screen replacement solution. Call us on 1300 727 791 or visit our website. We replace shower screens right across Brisbane’s northern suburbs, including North Lakes, Redcliffe, Caboolture, Brendale and Aspley.

Get a Free Quote Today

Frequently Asked Questions About Shower Screen Replacement

How often should a shower screen be replaced?

Most quality shower screens last around 10–20 years. Replacement timing depends on maintenance, installation quality, glass condition and hardware performance.

Can a cracked shower screen be repaired?

No. Cracked toughened glass generally requires replacement because repairing damaged safety glass is not recommended.

Should I replace my shower screen during a bathroom renovation?

Yes. Installing a new shower screen during a renovation helps complete the updated design and improves the overall finish of your bathroom.

How much does shower screen replacement cost?

The cost depends on several factors, such as shower screen style, glass thickness, screen size, hardware selection, and installation requirements. A professional quote provides the most accurate estimate based on your bathroom needs.

The Shower Screen Installation Process

Replacing your old shower screen doesn’t have to be a hassle – and certainly not when you’ve got Budget Shower Screens on the job!

Our aim is to make the whole process simple, stress-free, and surprisingly fast for you.

If you’re in the market for a new custom shower screen, here’s what you can expect from our experts – from start to sparkling finish.

Step 1: First Contact

Give us a ring, and we’re onto it. At Budget Shower Screens, we pride ourselves on quick responses and reliable follow-up. You won’t be left waiting or wondering – we’ll book in a time that works for you and keep you informed every step of the way.

Step 2: Free Measure and Quote

Next, we’ll come to you for a no-obligation on-site measure and quote. This is where our experience really shines. Not only do we answer all your questions – we also offer tailored suggestions to suit your space and budget.

Tricky bathroom layout? Unsure whether to choose framed, frameless, clear, or frosted? And dare we even mention frame colours or materials!? Don’t worry – we’ve got clever solutions and product knowledge to guide you to the best choice.

Step 3: Shower Screen Installation

Once you’re happy to go ahead, we get moving – fast. We remove your old screen, instal the new one with care and precision, and leave your bathroom spotless. Our expert installers are professional, punctual, and respectful of your home.

From first call to final clean-up, most jobs are completed within just 7 business days. Plus, our locally manufactured shower screens are guaranteed to fit perfectly.

Step 4: After Sales Service

We’re still here for you even after the instal. Our products are built to last, but if something’s not quite right, help is just a phone call or email away. One of our happy clients noticed a small water issue two years post-instal – we inspected and fixed it promptly, at no charge. That’s the kind of aftercare we’re known for.

Why Brisbane Loves Budget Shower Screens

Excellent communication. Prompt service. Professional, friendly team. Great prices. It’s no surprise we get such glowing reviews (aw, shucks!). Whether you’re updating your family bathroom or renovating an investment property, we make getting a new shower screen straightforward and affordable.

Ready for a bathroom upgrade? Contact Budget Shower Screens today on 1300 727 791 – we’ll look after you from first chat to final sparkle!

Continue reading

Tips for Creating an Accessible Bathroom

Tips for Creating an Accessible Bathroom (That Still Looks Great)

When someone you love starts finding the bathroom harder to use, the change is usually gradual. There’s a wobble stepping over the shower hob, a hand on the towel rail that was never meant to take their weight, a near-miss on wet tiles. Often, the first real conversation about it happens after a fall.

The good news is that you don’t need to move house, and you don’t always need a full renovation. With a few well-planned changes, most bathrooms can become safer, easier to use, and still look good. 

Here’s our practical guide on how to make a bathroom accessible, based on decades of fitting showers in homes across Brisbane.

What is an accessible bathroom?

An accessible bathroom is set up so anyone, no matter their age or mobility, can get in, move around, and bathe safely on their own. It often includes a step-free (hobless) shower, grab rails, slip-resistant floors, and taps and storage you can reach while seated.

Key features:

  • Remove the step into the shower. A hobless, walk-in shower is the single biggest safety upgrade.
  • Choose a shower screen with no bottom track and an entry wide enough for a walking frame or shower chair.
  • Install grab rails into reinforced walls, not just plasterboard.
  • Use slip-resistant tiles and controls you can reach while seated.
  • Plan for the needs you’ll have in five or ten years, not just today.

Why an Accessible Bathroom Matters

Why an Accessible Bathroom Matters

The bathroom is one of the riskiest rooms in any home. It has hard surfaces, wet floors and tight spaces, and it’s where we do things like stepping, twisting and bending that get harder with age or injury. For older Australians especially, a fall in the bathroom can mean a hospital stay and a big loss of confidence afterwards.

It affects a lot of households, too. According to the latest Australian Bureau of Statistics data, 5.5 million Australians, or 21.4% of the population, had disability in 2022. Add people recovering from surgery and people planning to age in place, and accessible design stops being a niche concern.

An accessible bathroom does more than just prevent accidents. It helps people keep their independence and dignity, letting them shower on their own terms. For some, it also means staying in the home they love instead of being forced to move.

Before You Renovate: Assess Needs Now and Later

Who will use the bathroom?

Start with the people, not the products. Different users need different things:

  • Ambulant users, who walk with a stick or frame, need support and stability: grab rails, a seat, and no step to negotiate.
  • Wheelchair users need circulation space, a wider door, knee clearance under the basin, and a completely level shower entry.
  • People who need a carer’s help need room for two, and a shower screen or door that opens fully so the carer can reach in without getting soaked.

Think about how needs might change. A bathroom that works for a walking frame today may need to suit a shower commode in a few years, and it’s far cheaper to plan for that now.

Get an occupational therapist assessment

An occupational therapist (OT) can assess how the person moves and recommend specific heights, rail positions, and layouts. If you’re hoping for funding, an OT report is usually required anyway. It’s worth having before you get quotes, so every trade is working from the same plan.

Understand the standards

You’ll hear AS 1428.1:2021 (Design for Access and Mobility) mentioned a lot. It’s mandatory for public and commercial buildings. It isn’t legally required in most private homes, but it’s the go-to reference for accessible design, so many designers and OTs use it as best practice. For example, it calls for a clear circulation space of at least 1540mm x 2070mm and a minimum door opening of 850mm. 

For new homes, the National Construction Code (NCC) 2022 includes the Livable Housing Design Standard. Queensland introduced these requirements for new homes on 1 October 2023. From 14 August 2026, updated Queensland provisions provide greater flexibility in accessible bathroom design, additional options for step-free access and a ramp-ready option for elevated homes. The narrow-lot exemption has also been extended until 30 September 2029.

Funding options

Depending on your circumstances, you may be able to get help with costs through:

  • NDIS home modifications for eligible participants. A qualified occupational therapist may need to complete a home modification assessment, depending on the type of modification.
  • Support at Home, which includes a separate Assistive Technology and Home Modifications (AT-HM) scheme for eligible participants. Bathroom redesigns and other accessibility modifications may be covered.
  • Home Assist Secure: a Queensland Government program that can provide eligible older people and people with disability with subsidised assistance for minor home modifications, such as grab rails and easy-turn taps. 

9 Tips for Creating an Accessible Bathroom

1. Go hobless with a walk-in shower

The hob, the raised lip at the shower entry, is where a lot of trips happen. A hobless, or walk-in, shower removes it, so you can walk or roll straight in.

To keep the water where it belongs, the floor needs a gentle fall towards a drain. A linear (strip) drain is often the best choice because it lets the whole floor slope one way, with no lip at the entry. Waterproofing has to be done properly, since a hobless shower has less margin for error than a traditional one.

Paul’s tip: Get the floor fall and drain sorted before you pick the screen. The screen works with the floor, not instead of it.

Explore our range of walk-in shower screens.

2. Choose the right shower screen for accessibility

This is the part most accessible bathroom guides skip, and it’s where we see the most mistakes. The wrong screen can undo all the good work of a hobless floor.

Avoid bottom tracks and channels. Sliding screens and many semi-frameless screens sit in a bottom track or channel. That track is only a few millimetres high, but it can catch a shuffling foot and stop the wheels of a shower chair or walking frame dead. For accessible showers, go trackless wherever you can.

Fixed walk-in panels are often the best option. A single frameless fixed panel with an open entry has nothing to open, nothing to trip on and nothing to break. It keeps the room light and open, and it’s the easiest option to live with day to day. It suits larger showers where there’s room for the water to settle before it reaches the entry.

If you need a door, make it swing out. In smaller showers, a door may be needed to contain water. Choose a pivot or hinged door that opens outward, so a carer can reach in and a person who has fallen against the door can still be reached from outside.

Consider fold-back panels for carer access. Bi-fold or pivoting panels that fold flat against the wall give a carer full access when needed, while still containing water during everyday use.

Leave enough entry width. A walking frame, wheelchair or shower commode needs more room than you might think. As a general guide, aim for a clear entry of at least 850–900mm, and check it against the specific equipment being used.

Insist on toughened safety glass. Shower glass should be toughened safety glass that complies with AS/NZS 2208:2023. We use 10mm glass on frameless screens for strength and stability.

Make cleaning easy. An easy-clean glass coating means less scrubbing, bending and stretching, which matters when the person using the shower is also the one cleaning it.

Screen type Accessibility Water containment Carer access Cleaning effort
Frameless fixed walk-in panel Excellent Good (needs good floor fall) Excellent Low
Frameless outward pivot door Very good Very good Good Low
Bi-fold / fold-back panel Very good Good Excellent Medium
Semi-frameless with channel Fair Very good Fair Medium
Sliding screen with bottom track Poor Very good Poor High

Paul’s tip: Bring the walking frame or shower chair along when we measure up, or at least its width. It saves a lot of guesswork.

3. Install grab rails where they’ll actually be used

Grab rails belong where people push, pull and lower themselves: inside the shower, beside the toilet and near the vanity. The key detail is the wall behind them. Rails need to be fixed into reinforced walls (timber noggins or appropriate structural fixings), not just plasterboard.

Grab rails don’t have to look like a hospital, either. Matte black, brushed brass and brushed nickel rails can match your tapware and look like a deliberate design choice.

4. Add a shower seat

Standing for a full shower can be tiring or unsafe for many people. A fold-down wall-mounted seat is sturdy and folds away when it’s not needed. It needs a reinforced wall. A portable shower chair is more flexible, but it takes up floor space.

Position the seat so the taps and hand shower are within easy reach without twisting. A seat height of around 470–480mm suits most people, though an OT can fine-tune it.

5. Choose slip-resistant flooring

Tiles are rated for slip resistance using a P-rating: the higher the number, the more grip. For wet areas like showers, P3 is generally the minimum, and many accessible bathrooms use P4 in the shower. 

Smaller tiles help too, because more grout lines mean more grip underfoot. Matte finishes are safer than glossy ones.

6. Make taps and showers easy and safe to use

Lever mixers are much easier than twist taps for arthritic hands. Mount the controls so they can be reached from a seated position, ideally near the shower entry, so the water can be adjusted before stepping in.

A hand-held shower on a slide rail lets users shower seated or standing, and makes a carer’s job easier. A thermostatic mixing valve keeps the water at a steady, safe temperature and helps prevent scalds.

7. Lower or float the vanity, and adjust the mirror

A wall-hung vanity with clear space underneath lets a wheelchair user roll in close. Keep the basin shallow and the taps within easy reach.

The mirror should be useful from a seated position as well as standing. Mount it lower, or choose a mirror that extends further down the wall. Take a look at our custom bathroom mirrors, made to measure for your space.

8. Widen the doorway and rethink the door

A standard bathroom door is often too narrow for a wheelchair or walking frame. Aim for a clear opening of around 850mm.

The door’s direction matters too. A door that swings outward, or a sliding or cavity door, means you can still get in if someone has fallen behind it. Cavity doors also free up valuable floor space.

9. Plan storage, lighting and contrast

Keep everyday items like toiletries, towels and medication between hip and shoulder height, so there’s no stretching or bending. Motion-sensor night lighting makes 2am bathroom trips safer. Colour contrast, such as a dark grab rail against a light wall or a contrasting toilet seat, helps people with low vision find what they need.

Accessible Doesn’t Have to Look Clinical

Many families worry that an accessible bathroom will feel like a hospital room, but it doesn’t have to. Warm colour palettes, timber-look vanities, frameless glass that keeps the room open and bright, and grab rails in finishes that match your tapware can make an accessible bathroom one of the nicest rooms in the house.

In fact, many of these features are simply good design. Anyone appreciates a step-free shower, good lighting and a screen that’s easy to clean.

Accessible Bathroom Checklist

  • OT assessment completed (and funding eligibility checked)
  • Hobless, step-free shower entry
  • Floor falls to a linear drain
  • Trackless shower screen with a clear entry of 850mm or more
  • Outward-opening or fold-back screen door, if a door is needed
  • 10mm toughened safety glass with an easy-clean coating
  • Walls reinforced for grab rails and a seat
  • Grab rails at the shower, toilet and vanity
  • Fold-down or portable shower seat
  • P3+ slip-resistant tiles (P4 in the shower)
  • Lever taps, hand-held shower and thermostatic mixing valve
  • Wall-hung vanity and mirror usable from a seated position
  • Doorway with a clear opening of around 850mm, outward or sliding door
  • Night lighting and colour contrast

Planning an Accessible Bathroom in North Brisbane?

At Budget Shower Screens Brisbane, we’ve spent 40 years helping homeowners create safer, better-looking bathrooms, and no job is too small. Whether you need a single trackless screen to replace an old slider or a custom walk-in screen for a full accessible renovation, we’ll measure, advise and install with care.

We service Chermside, Aspley, North Lakes, Albany Creek, Strathpine, Stafford and surrounding North Brisbane suburbs.

Book your free measure and quote or call 1300 727 791 today.

Frequently Asked Questions

What makes a bathroom accessible?

An accessible bathroom lets people of any age or ability use it safely and independently. Key features include a step-free shower, grab rails in reinforced walls, slip-resistant floors, a shower seat, lever taps, a wall-hung vanity, and enough door width and floor space for mobility aids.

What is the best shower screen for an elderly person?

A frameless fixed walk-in panel is usually the best choice. It has no bottom track to trip on, no door to manage, and it’s easy to clean. If you need a door, choose one that opens outward so a carer can help. Avoid sliding screens with bottom tracks.

Can you have a shower screen with a hobless or walk-in shower?

Yes. Frameless screens are ideal for hobless showers. The floor slopes toward a drain, often a linear drain, and the glass is fixed with a gap at the entry. The screen and floor fall work together to keep water inside the shower.

How wide should an accessible shower entry be?

As a general guide, allow a clear entry of at least 850–900mm for walking frames, wheelchairs or shower commodes. The right width depends on the equipment being used, so measure the actual aid or follow your occupational therapist’s recommendations.

Does NDIS pay for bathroom modifications?

The NDIS can fund home modifications, including bathrooms, for eligible participants when they’re considered reasonable and necessary. You’ll usually need an occupational therapist’s assessment and report, and larger jobs may need quotes from approved builders. Check with your NDIS planner before starting work.

Do I have to follow AS 1428.1 in my home?

Generally, no. AS 1428.1:2021 is mandatory where the applicable building and access requirements reference it. However, it’s widely used as best practice for accessible homes, and funded modifications may be expected to align with it. New homes must also meet the NCC’s Livable Housing Design requirements.

How much does an accessible bathroom renovation cost in Brisbane?

It depends on the scope. Swapping a sliding screen for a trackless frameless screen and adding grab rails costs far less than removing a hob, re-waterproofing and re-tiling. Every bathroom is different, so we recommend a free on-site measure and quote.

Can you retrofit a shower screen without a full renovation?

Often, yes. If your shower is already hobless, or has a low step, replacing an old sliding screen with a frameless panel or outward-opening door can make a big difference without re-tiling. We’ll check your floor falls and walls during the measure-up to confirm what’s possible.